
Some ideas are hard to explain in a paragraph: how a program works, where a gift goes, why a policy change matters. A short explainer video can make them clear in a minute or two by pairing a plain-language script with visuals designed to carry the idea. This guide covers how to plan a nonprofit explainer video, from the message and script to storyboarding, design, accessibility and placement.
In short: A nonprofit explainer video is a short, scripted video, often animated, that makes one idea easy to understand. Start with one message and one audience, write a tight script and time it aloud, storyboard before any animation begins, keep the design on brand, caption everything, and plan the cuts for each place the video will run.
When to use an explainer video
Explainers work best when the challenge is understanding, not awareness: supporters care about your cause but cannot picture what you do, or a process has more steps than people will read. Story-driven video still has a role, and the two often sit side by side, with the explainer handling the “how” and a short story the “why.”
In our work with nonprofits and associations, a handful of uses come up most often. A program explainer shows how a service works from first contact to outcome. A how-to-give video walks through monthly giving, gifts of stock or planned giving. Advocacy issue explainers break down a bill, a regulation or a systems problem. Volunteer and member onboarding videos give every newcomer the same clear introduction, and an annual report or impact summary can turn the year’s highlights into a short recap for the website, email and the gala screen.
Define one message and one audience
The most common reason explainers fall flat is that they try to say everything. Before anyone writes the script, agree on the one sentence a viewer should be able to repeat afterward, such as “a monthly gift keeps a tutor in the classroom all year.” Every line either supports it or comes out.
Then name the audience as narrowly as you can. A first-time donor, a legislative staffer, a new chapter volunteer and a foundation program officer need different vocabulary, different levels of detail and different next steps. Write down what they already know, what they tend to misunderstand, and the single action you want them to take when the video ends.
Write the explainer video script
The script is the blueprint for everything that follows, so lock it before design begins. Most explainers follow a simple shape: name the problem or question, show how your approach works, make the result concrete, and close with one clear call to action. A light story thread, such as following one family through the steps, can help, but the explanation stays in charge.
Word count sets the length. A common planning rule of thumb in voiceover work is about 150 words per minute at a natural pace, so a 60-second explainer holds roughly 140 to 150 spoken words and a 90-second piece roughly 200 to 225. Read the script aloud with a timer before anyone storyboards it, because a script that looks short on paper often runs long out loud.
Write the way people talk. Use short sentences, everyday words and one idea per line, and swap acronyms and grant language for what the program actually does. If a sentence needs a footnote, it probably belongs on the page around the video, not in the voiceover.
Storyboarding an explainer video
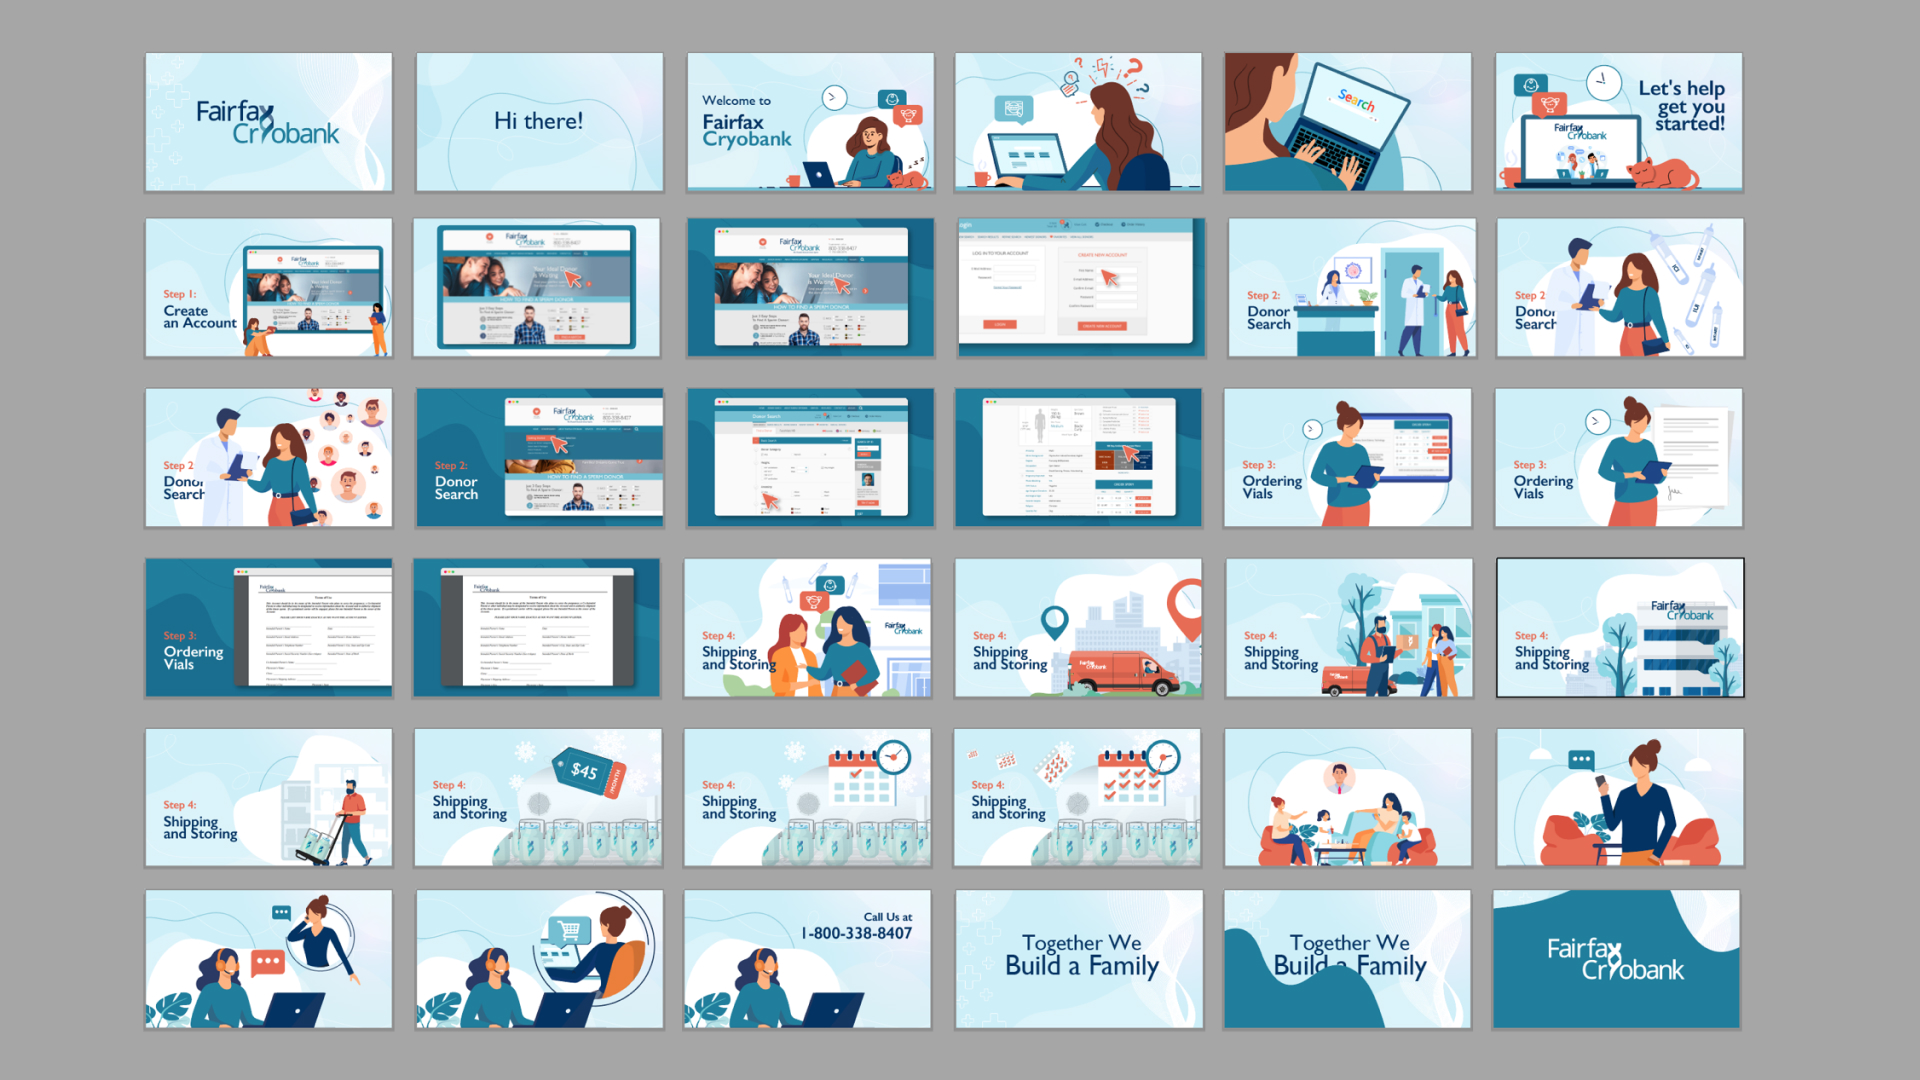
Storyboarding turns the script into a sequence of pictures, and it is the least expensive place to make changes. Once animation starts, every revision costs design time, so the goal is to settle composition, pacing and on-screen text while the frames are still drawings. A typical process runs in five stages:
- Script breakdown. Split the locked script into short beats, usually one line or idea each, and note what the viewer should see during each one.
- Thumbnail storyboard. Rough sketches map each beat to a scene, with notes on movement, transitions and on-screen text.
- Style frames. Two or three fully designed frames set the look: illustration style, color, type and how people and icons are drawn. Approve these before the full board is designed.
- Full storyboard. Every frame is designed in the approved style and paired with its script line, so reviewers can read the video like a comic strip.
- Animatic. The frames are timed to a scratch or final voiceover with rough movement, so you can judge pacing before final animation.
Build a review round into the schedule at the script, style frame, storyboard and animatic stages, and agree up front who signs off at each one. One consolidated set of comments per round keeps the project moving and avoids late changes that ripple through finished animation.
Animation, live action or hybrid
Motion graphics and illustrated animation are the default for many nonprofit explainers. They can show what is hard to film, such as policy, data, services where privacy matters, or work spread across many locations, and they age well because they do not depend on footage that dates quickly.
Live action suits explainers where seeing real people, places and processes builds trust, such as a facility walkthrough or a volunteer how-to. It needs shoot days, locations and informed consent from anyone on camera. A hybrid, such as filmed footage with animated callouts or data overlays, pairs real footage with the clarity of graphics.
Simple, flat illustration keeps attention on the idea, while detailed or textured styles add warmth but take longer to produce. Show people with dignity and represent the communities you serve thoughtfully rather than relying on generic stock characters.
Keep the explainer on brand
An explainer should look and sound like the rest of your organization. Use your brand colors, typefaces and logo rules, then extend them into a small motion toolkit: how text animates on, how icons are drawn, how scenes transition, and a consistent end card. If your nonprofit branding guidelines do not cover motion yet, an explainer project is a good moment to add that page. The toolkit pays off in continuity, because the next explainer, social clip or event opener can reuse the same assets instead of starting over.
Voiceover, music and sound
The voice carries the explanation, so cast it with care. Professional voice talent gives a consistent, clear read, while a staff member, volunteer or program participant can add authenticity when the delivery is natural and the recording is clean. If you serve multilingual communities, plan language versions early; visuals that carry little on-screen text make them much easier to produce.
Music should support the pace without competing with the voice. Use properly licensed tracks, keep them low under narration, and use sound effects sparingly to mark key moments. Record the voiceover before final animation so motion can be timed to the read.
Explainer video accessibility
Captions are essential. Many people watch with the sound off, and people who are deaf or hard of hearing rely on them. The W3C explains that captions for prerecorded video are required at WCAG Level A, and that audio description is expected at Level AA when important information is shown only visually.
Explainers make this easier than most formats: write the script so key visuals are described in the voiceover, which reduces the need for separate audio description. Use accurate, edited captions rather than raw automatic ones, keep on-screen text large and high in contrast, and hold it long enough to read. Avoid rapid flashing, publish a transcript on the page where the video is embedded, and use a player with keyboard controls and no autoplay with sound. Our guide to nonprofit website accessibility covers the rest of the site.
Plan length and platform cuts
Decide where the video will run before the storyboard is final, because each placement changes the framing and the length. Planned early, scenes can be composed to crop cleanly and reuse animation across versions:
- A main website version, often 60 to 120 seconds, in a 16:9 frame.
- Short vertical and square cutdowns for social media, with captions burned in and the message landing in the first few seconds.
- An email version, sent as a thumbnail with a play button that links to the video’s page.
- An event version for large screens, with bigger type and a mix that still works when the room is noisy.
Where to place your explainer video
Put the main video where the question it answers comes up. A program explainer belongs near the top of the program page, an advocacy explainer on the campaign page beside the action form, and a how-to-give video on the ways-to-give or planned giving page. On a donation page, a short explainer can answer “where does my gift go?” as long as it does not push the form down or slow the page. Load the player only when someone presses play, behind a lightweight thumbnail, so the page stays fast.
Add a short heading and the transcript, repeat the call to action in text below the player, and track completion rate and clicks on that next step rather than views alone.
Brief and review with your partner
A clear brief saves review rounds later. Whether you produce in house or with an agency, share these before kickoff:
- the one-sentence message, the audience and the action you want viewers to take
- where the video will live and which cuts you need
- brand guidelines, existing illustrations, and examples you like or dislike, with reasons
- facts, terms and claims that must be exact, and who approves them
- timeline, budget range and who signs off at each stage
We see the smoothest projects when one person on the nonprofit side gathers feedback and speaks for the team, and when the design partner shares work at each storyboard stage instead of revealing a finished video. That rhythm keeps the explainer tailored to your organization while changes are still easy to make.
Nonprofit Explainer Video FAQ
How long should a nonprofit explainer video be?
Long enough to make one idea clear and no longer. Many website explainers run 60 to 120 seconds, and social cutdowns are often under a minute. Let the script set the length: read it aloud, time it, and trim until it fits.
How much does an explainer video cost?
Cost depends on length, visual style, how much custom illustration and character animation is involved, voice talent, music licensing, language versions and the number of review rounds. A flexible scope, such as a simpler style or fewer cutdowns, can fit the project to your budget.
How long does it take to produce an explainer video?
It depends on length, style and how quickly feedback comes back. The script and storyboard stages can take as long as the animation itself, so build review time into the schedule and leave a buffer before a campaign launch or event.
Do explainer videos need captions?
Yes. WCAG requires captions for prerecorded video with audio at Level A. Captions also help the many people who watch with the sound off, especially on social media.
What is the difference between an explainer video and a storytelling video?
An explainer makes an idea, program or process easy to understand. A storytelling video introduces a person and their experience to build connection. Many nonprofits use both, with the explainer covering how the work happens and the story showing why it matters.
Many nonprofits handle quick updates in house and bring in a design partner for explainers that carry a program, a campaign or an annual report. If you need help with scripting, storyboarding, illustration or animation, see LightMix’s animation and video work and how it fits into its nonprofit services.